Click title or picture for full article.
Wilderness Survival Shelter - Lean-to
How to build a lean-to
Ambient temperature midday 52 (°F), nighttime 28 (°F)
Weather: scattered showers - wind gusts up to 30 MPH

The lean-to shelter is one of the most popular shelters in any survival documentation. It is an uncomplicated shelter to build and if you have a tarp, mylar blanket (emergency blanket) or poncho, it should only take a few minutes. Whether making more permanent wooden lean-to or a quick emergency shelter, the lean-to will protect you from environmental threats. One of the reasons a lean-to is so popular is you can build a it out of almost anything. Materials such as trash bags, tarp, poncho or plastic sheet can be used to water proof the shelter. In the following link we discuss building shelters using tarps, ponchos, and emergency blankets.

Click title or picture for full article.
For this article we decided to build a lean-to using debris shelter techniques. The location of this shelter was less than perfect. We chose this location making sure there were no branches above that could crash down in the middle of the night. With wind gusts up to 30 MPH, several trees were damaged in the area already. Our goal was to get out of the wind and the scattered showers.
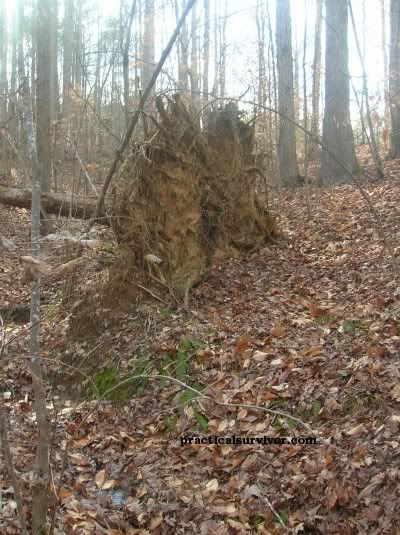
A lean-to can be constructed quicker if a natural structure is used as a wall. For instance this fallen tree could help conserve build time.

We did not want to use any man made materials for the lean-to build so we used this vine as cordage. Carrying MILSPEC parachute cord would simplify and speed up the process.


First step to build the lean-to is to fasten what I can the "backbone" of the shelter. The backbone will hold all the weight of the other branches and the debris. Its a good idea to test it before going further. If it is snowing, keep in mind the added weight of the snow. We would hate to spend hours building the shelter just to see it collapse.

Keeping in mind that we want to sit under the shelter, we add branches at about a 45° angle. Note: The angle is usually going to have to be different when using material such as spruce boughs for roofing. This will help limit leaking. Sometimes it makes sense to build it with a steeper angle so it sheds rain or snow.


Add branches closely together. This keeps the debris from falling through.


Thinking it may rain again, we began to add the debris before the shelter was finished. If possible either wear gloves or construct a rake out of a branch with several forks. Keep in mind that bugs and snakes like to hide under the debris.


Adding small branches on top of the debris will keep the leaves from being blown away.


Preferably, we like to cover the sides of the lean-to. This will minimize the wind draft. Here we add smaller branches (ribs) to the sides of the shelter.


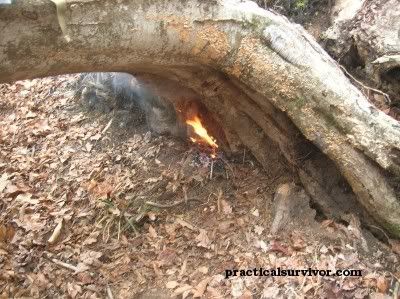
Once the shelter is finished, we started a fire. Surrounding the fire with rocks not only protects from the wind but we can later use the hot stones for warmth. The radiative heat should help to keep you warm and hopefully dry the leaves inside the shelter.

We can modify the shelter in different ways to make it warmer and adding more debris to the top is always a good idea.

To help keep us warm, we built a fire-wall to help reflect the heat and block the wind. Using a reflective material such as mylar from an emergency blanket would further increase warmth from radiation.


So there it is, the lean-to shelter. Not the warmest shelter, but it can be built quickly and could possibly save your life. Keeping yourself dry can make all the difference in the world.
Keep in mind that a lean-to shelters can be built in comparatively little time using a poncho or tarp. The genuine military issue ponchos work great however there are nice quality reflective tarps that will help by using radiative heat from your fire. Here are some links to a Red Reflective Tarp and an Olive Drab Green Reflective Tarp.

Adventure Medical Kits makes a nice quality reflective mylar blanket that can be used as a lean to or sun shelter. Link here:Adventure Medical Kit SOL Survival Blanket and the Adventure Medical Utility Blanket.
Below is an example of a shelter we quickly put together out of an inexpensive survival blanket. A quick emergency shelter like this one could help us to block wind, radiative heat and precipitation. Tarps are more rugged and can withstand higher winds. Tarp shelters are covered in the articles below. Tarps are less likely to tear and have built in grommets for tying purposes. An alternative can be to simply place the mylar blanket inside of a shelter similar to the one built in this article to reflect the heat from your fire. Always remember that being creative and getting out of the elements is often the key to survival.


Mors Kochanski designed the super shelter. Commonly seen in a dome-like geometry, it can also be built using a lean to. With some slight modifications, we built a raised bed to allow room for a cold well, filled the gaps with leaves and used a parallel log fire to keep us warm throughout the night. We were able to raise the temperature in the shelter 40+ degrees Fahrenheit with minimal insulation. Had they been available, we could have added hot rocks in the shelter to raise the temperature further. One of the many advantages of this shelter is the option to dry our clothes and gear.


Please see our other shelter articles for examples on the a-frame shelter, poncho shelter and tarp shelters.
Shelter

Click title or picture for full article.
Double Lean-to (A-frame shelter)

Click title or picture for full article.

Click title or picture for full article.

Click title or picture for full article.

practicalsurvivor.com is licensed under a Creative Commons Attribution-Noncommercial-No Derivative Works 3.0 Unported License.
